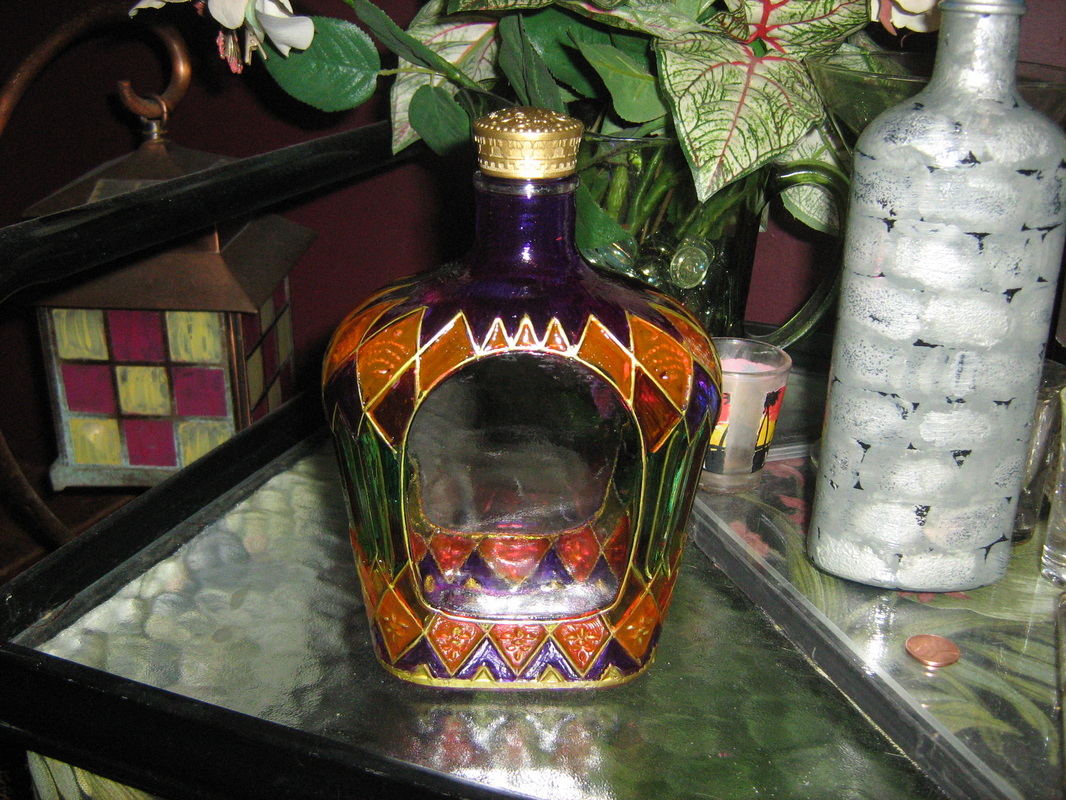
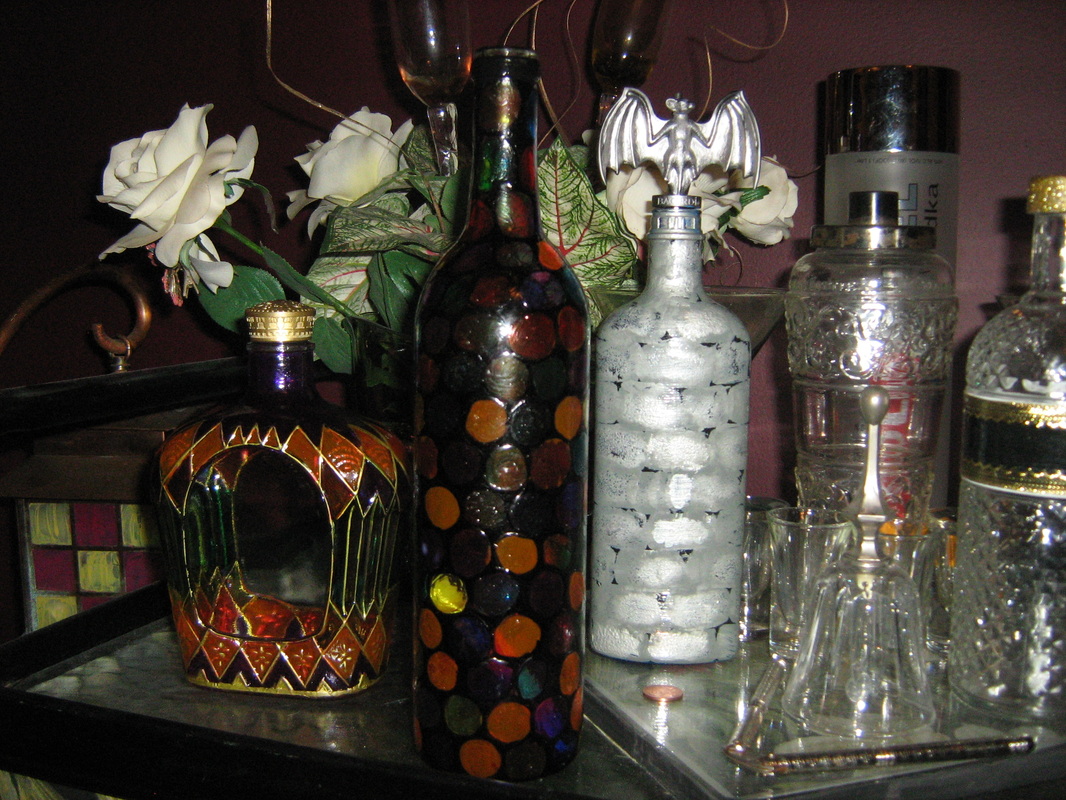
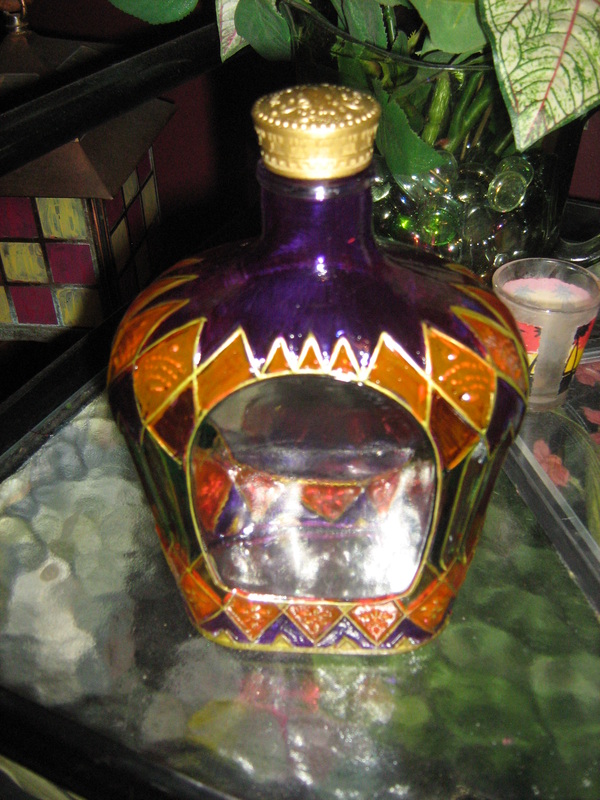
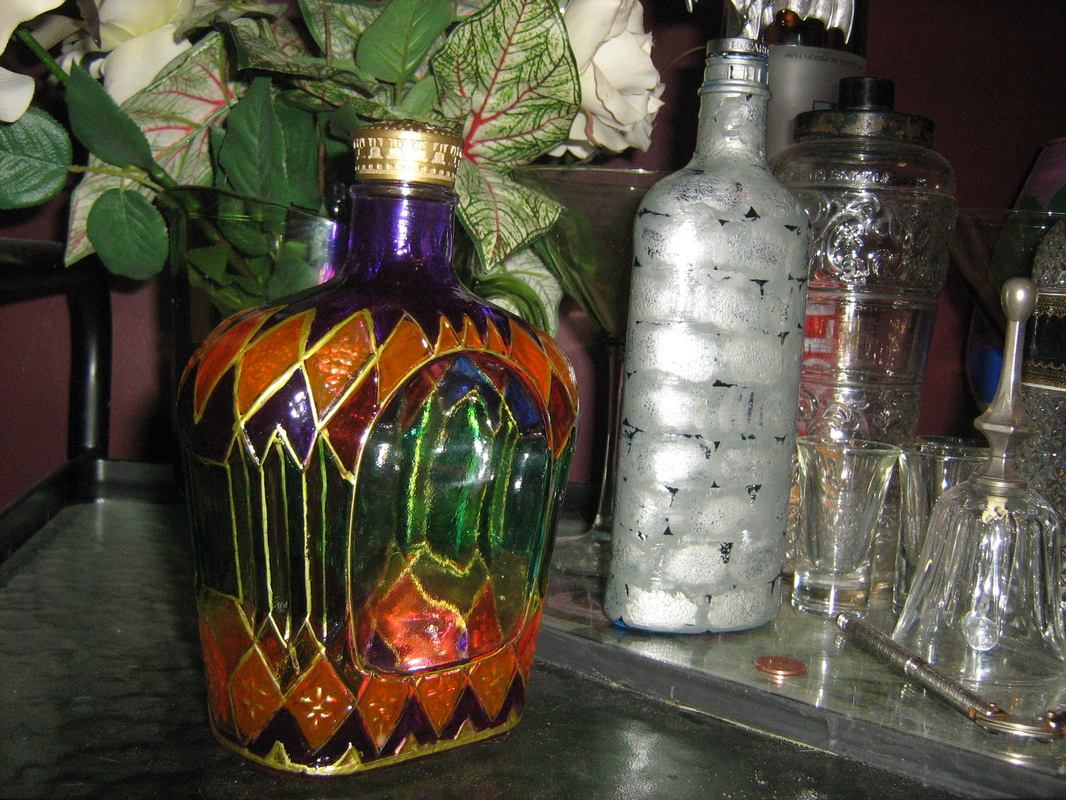
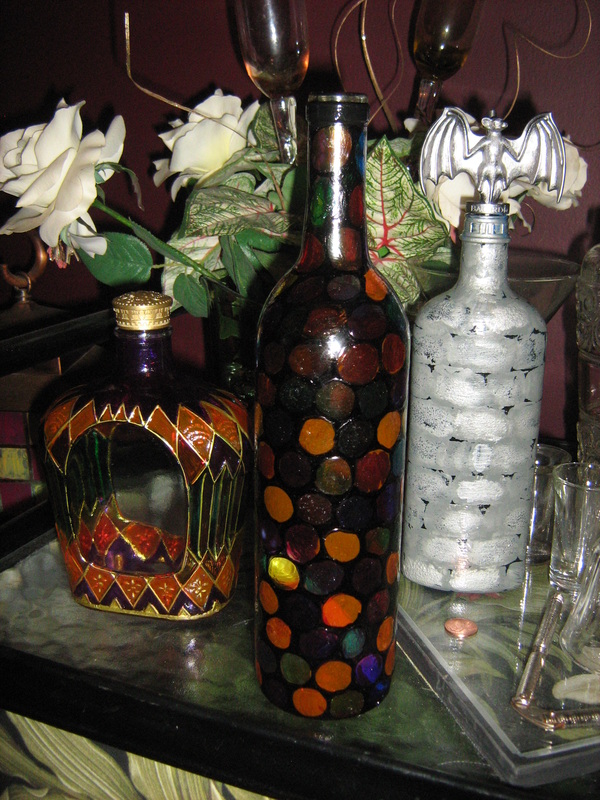
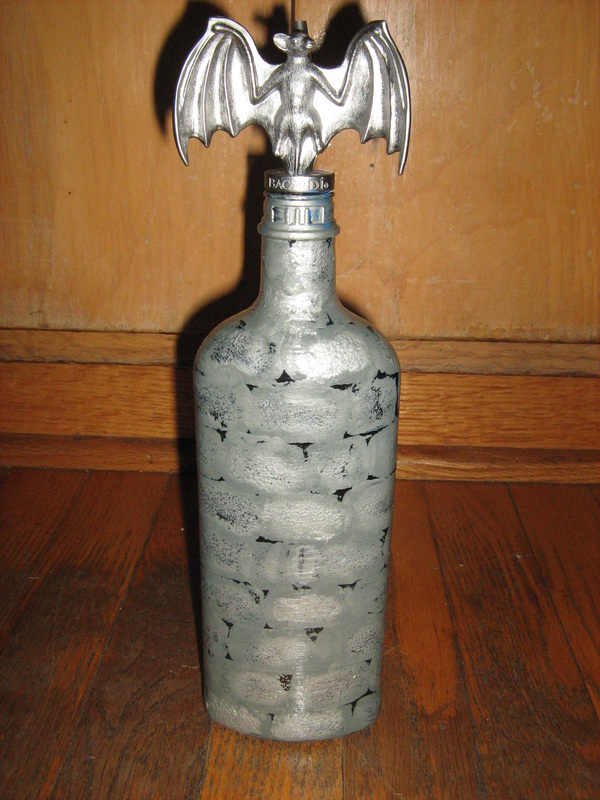
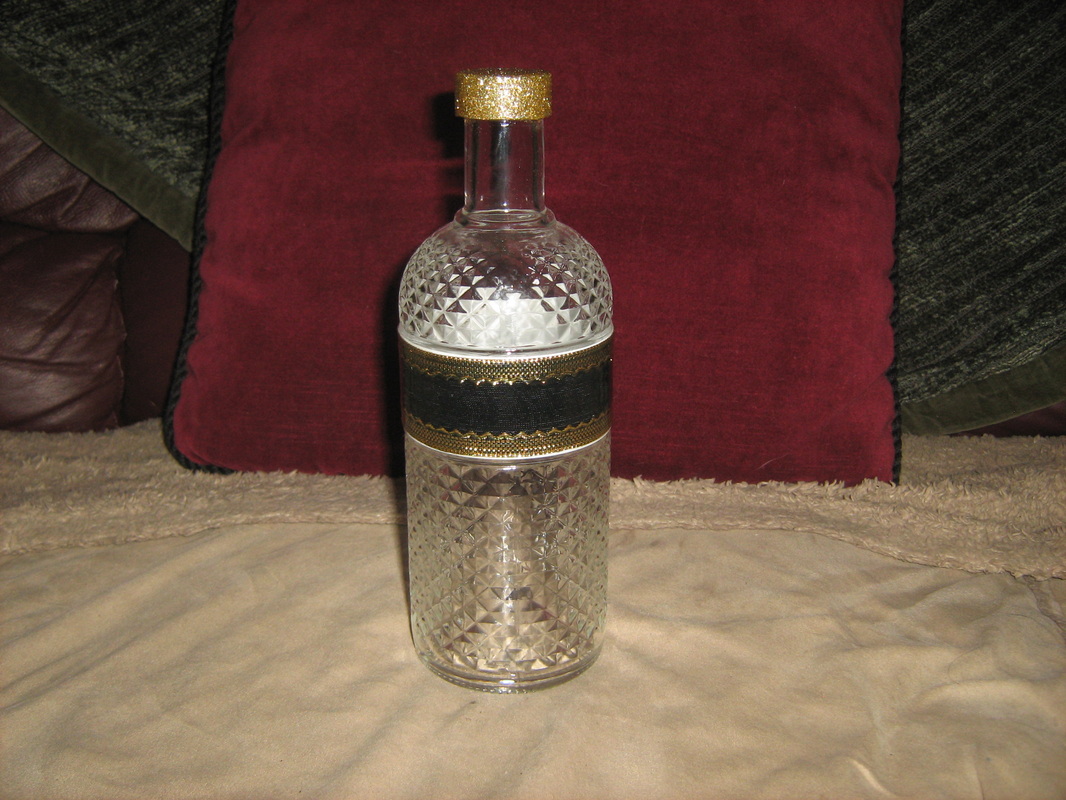
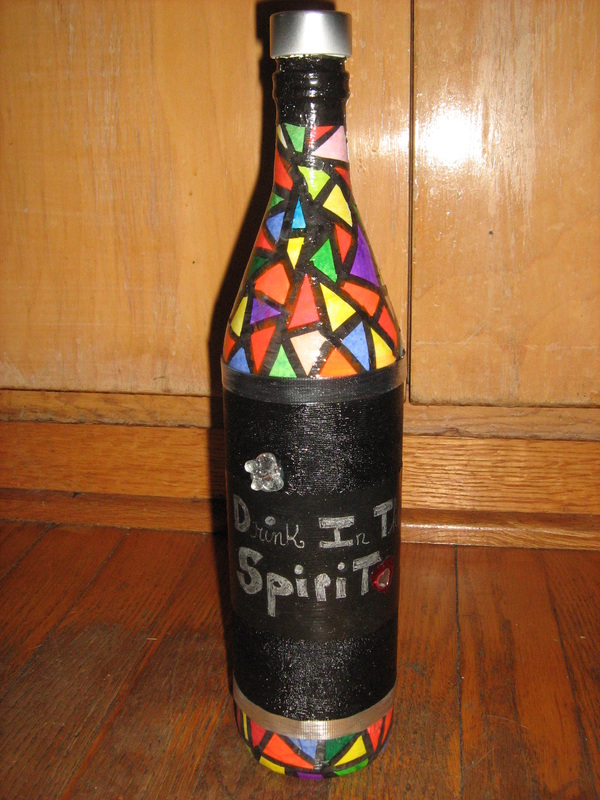
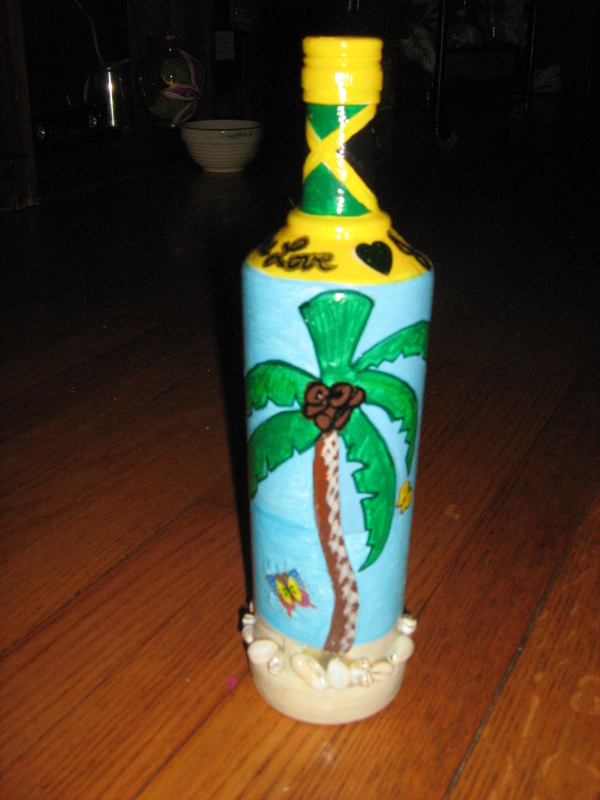
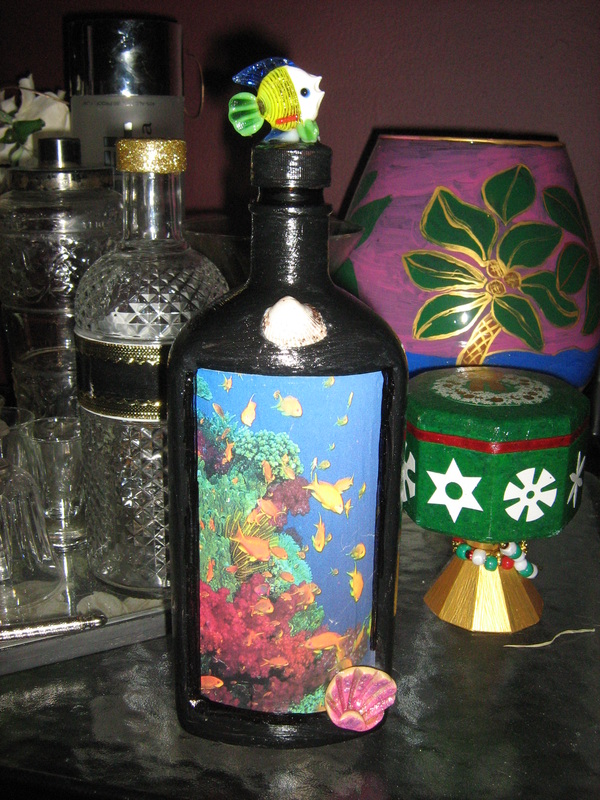
My son (23) and his friends save me bottles for my arts and crafts. I made the altered bottle with the bat on top and castle blocks (in pic to right ) for him as a thank you! He recently brought me a Royal Crown bottle. The bottle is really beautiful and I want to use the natural beauty of what ever I use in my art or as my art. As always when I am not sure of what to do I leave it in site of my day and at some point within a few days I figure it out.....Sure enough I did with this bottle too! The crazy part is that I used perminant markers to create the fuax colored or stained glass. I used modge podge but you must use sparringly and do one color at time. I left the lable spot open to see the beauty of the glass and color. I made another one that looks like glass balls...also one could use a dry erase marker to right what booze goes into it...as each of my decanters are functional art!
As always I like to use something that would have been thrown away or in recycling as my art because it is free and it helps save our earth one project at a time. Having young adult kids and all of their friends I never run out of booze bottles of all sizes, shapes and colors. The next best thing is that the possabilities are endless. You can use anything or any combination of things to decorate and embellish. The idea is whatever you can imagine you can create on a bottle. What also is nice is that they are functioning art. They are a decanter for alcohol. Because I beleive the ideas are endless....I am going to share with you some of my recent altered bottles....Under christmas is the christmas bottles...these are many different bottles... enjoy!
this was made for Liz and her hubby out of the invitation and thank you card. I went with the invitation theeme and added on to it.
My son brought home the bottle topper and I wanted to make a bottle fitting of the topper.
I loved the look of the glass so all I did was add this beautiful ribbon I had and then glittered the top gold to match....so simple!
I saw these on pinterest. I thought I can do that....and so I did. First thing i did was tape a peice of wire to the top for hanging. Then I decupaged paper onto the light bulb and added a few stickers to some. I made the baskets by using sun bathing mats and caps from 2 liter bottles with tooth picks acting as the ropes. Really simple and cute.
my green green & not much green chandelier has it's name beacause it is green in color, green in that it is made from pop 2 lt's and water bottles, and not much green because I had to spend $8.50 on brass wire when I ran out...but i only used about half so more like $4.25 and that is not much! Everything other than the wire I bought I had in the art studio.
When I started I switched the bulbs to smaller bulbs and my honer put in a dimmer switch for me. I cut out roundish to oval shaper close in shape peices from 7 up, siera mist, and sprite pop bottles for the green peices. I used water bottles for the clear peises. I made strands by stringing them together with wire and beads in between them. I had a found large plastic round hoop the perfect size as a base. I wound white ribbon around it to hide the brown and the wires holding them up. My honey hung it up with two hanger wires...... we love it!
After painting my window the jamaican sunset I wanted an awning like above it. I had this table cloth I had used and was from the dollar store. i staples it to the top by the ceiling and let it hang over the white curtain rod. You can see it was easy and if i had another long rod I would have used it for the top part but then it would have just hung straight down rather than looking more like an awning. You can see I made a dry erase board by painting the design on the glass in reverse.
This is your new blog post. Click here and start typing, or drag in elements from the top bar.
This is my main craft desk. and this is the first part i made of this set. I used glue and just made a collage of bling and buttons and jewlery and shells...whateve i found and wanted in it i glued to it!
I did this part on a frame with a peice of wood in it insread of glass. I attached it to the book case door by first putting two eye hooks into the book case door just to the sides of the frame and then held the frame in place whils screwing in an eye hook through the first eye hook into the frame on both sides...it allows it to swing a bit but mainly I can remove it easily and the eye hook holes could be fixed easily as well.
Just a box that i painted white and then made to match.
This is your new blog post. Click here and start typing, or drag in elements from the top bar.
Pulling any room together may require a face lift....painting all your frames the same color is one way of bringing it together....I like things that match. Using a little contact paper you can make anything match too!
the desk was completely white while the big work table (lower right corner)had a pink and white top.
the green and white contact paper 2 rolls from $dollar store was more than enough!
using the bottom of a plastic 2lt bottle i papered it and now i have a cute garbage for on my desk....
I found books of material on the side of the street on garbage day. I used these to make curtains for the top paert of the glass door. Keep in mind that this door goes out to our garbage porch and is next to the house next door. The grapes and leaves I had.
I painted on the inside of this window in a simple pattern in the colors of my kitchen with black as a boarder. It looks beautiful on a sunny day or at night with the back porch light on.
Finally I Painted the panals of the door the colors of the kitchen with the black as a boarder here too .
I wanted to make Laura my eldest a desk set for her bedroom. Her bedroom was done tropical (it is my art studio now) so I wanted it to have a fun tropical feeling to it. I found this and that...A table on the side of the road, a shelf and the sides of a chair made the desk. I painted everything i wanted to match white first so that the colors would pop and feel dull. Then i painted it all yellow Paint left over from the walls. Then I took a green and a very stiff brush and brushed it on and off in a way that made a grass like pattern. It gave it a bit of texture and that island feel.
Adding her name to the desk with stickers I already had and flowers I cut out of wallpaper I had found books of..... I also added a bit of bling . I did the garbage can to match and the other side with the wall mural in small.... the pencile holder and envelope opener were also done to match as was the small shelves above the desk. You can see the last two pics are the painting Hannah did that was the inspiration for the design and the mural as well. This is now my grandson sams art desk with his own stuff and he can paint whenever he wants!
When our refrigerator dies I took what I could from inside to use or at least recycle. This was for the milk ..now it keeps my cats out of my plants and the sun or light in!
ok ok I cheated I saw these nice plants for 2$ each and could not resist!
Water jugs make great see through storage bins
I use the vegie and lunchmeat drawers for my paints, The main shelf to work on and the door shelves to store paints for projects in progress!