    |     |     |     |
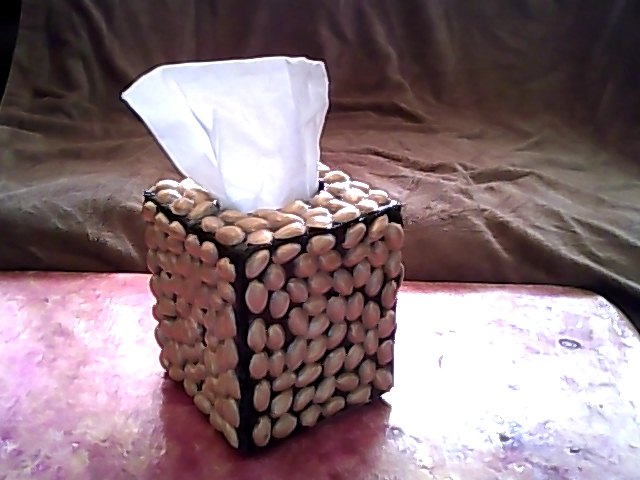 Another very easy project but you must plan for it! You have to eat a bag or two of pistachio nuts. Save the shells and wash in warm water let dry for a day or two. Meanwhile find a cardboard box that is around 20 inches squared. Take an empty tissue box and take it apart. lay it out only leave off the bottom (so you can put in a new box ) and the seem side make a whole side like the opposite. It is important to make it a hair larger than the tissue box so a tissue box will fit into it. Make sure to trace the opening at the top too. I used a heavy brown cardboard box so I only scored the outline into it then folded it and hot glued it. I painted the whole outside black. After the shells were dry I painted them gold then glued them to the black box and in the end put a coat of modge podge. I really love how it turned out and again it was free! 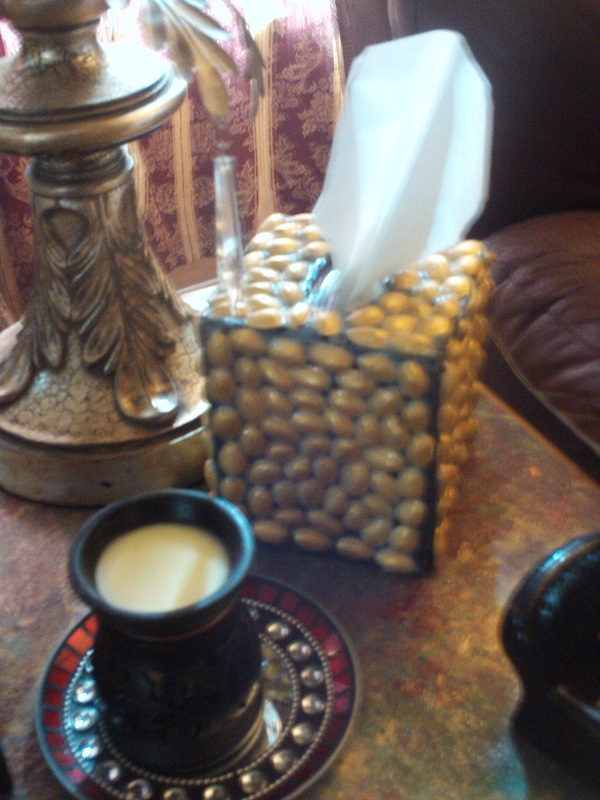
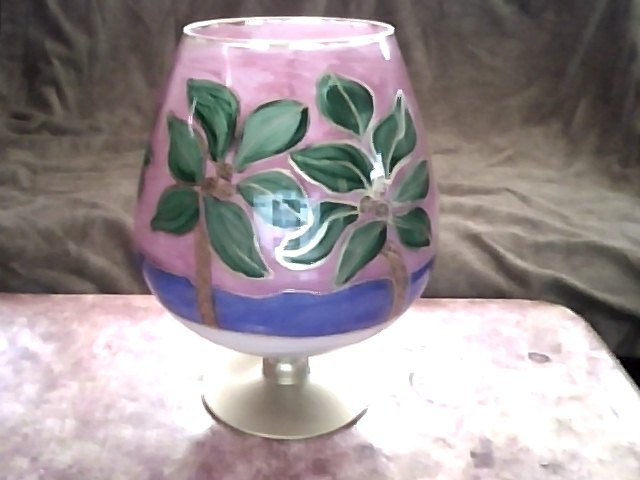
These are so easy to make and are bueatiful when a tea candle is lit.
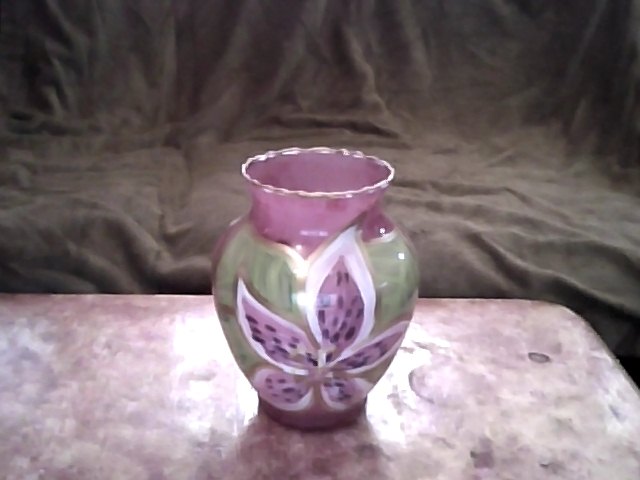
what you need clear glass vase dry erase marker 2 or 3 paintbrushed cut in half so the length is shortened to fit inside the vase paints (acrylic) Gold or silver paint rubbing alcohol soft towel to make the paint stick you have to clean the inside with rubbing alcohol and a soft cloth. clean the outside to the dry erase marker will stay on it. Draw your design on the outside of the vase with the dry erase marker. cut your paintbrushed to fit inside the vase so you can paint your design. Paint your design with only one coat of paint to let the light shine through. when done let it drt completely and then wipe off the drt erase on the outside. Lastly outline the design in gold or silver on the outside of the glass. It gives it depth and bling.....Now put a tea light in it and then tadaa!!!!! beautiful!!!!! 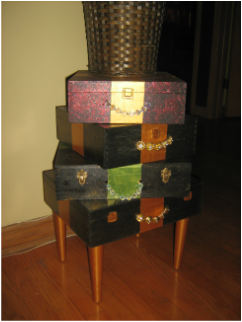 This was fun and simple and looks so nice!
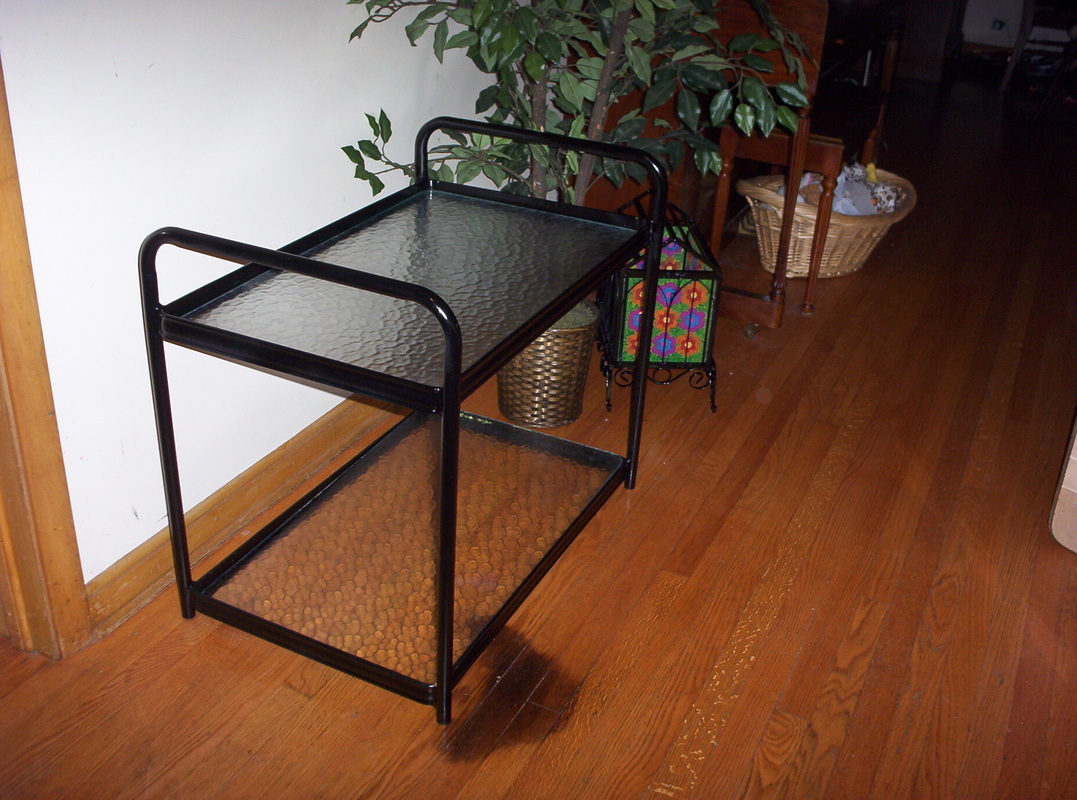
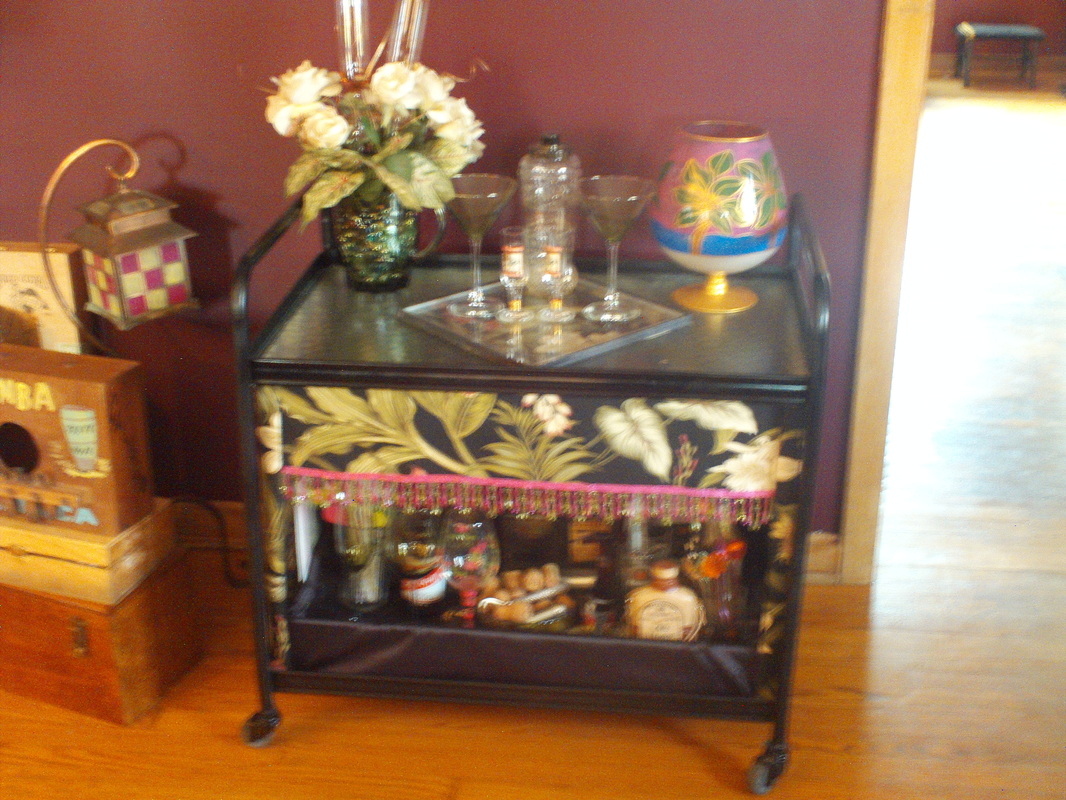
I painted the wine boxes in the design I wanted. I added 4 painted legs to the bottom of one and cut off the rope handals replacing them with decorative buttons and beads on wire and glued on the inside with hot glue. In the sun they sparkle and I have one of my fake trees on it...as I am green but my thumbs are not! Inside I hide all my cords and chargers and everything is organized. I found this lime green thing on the side of the road. The bones were good the glass was perfect and it had all four wheels
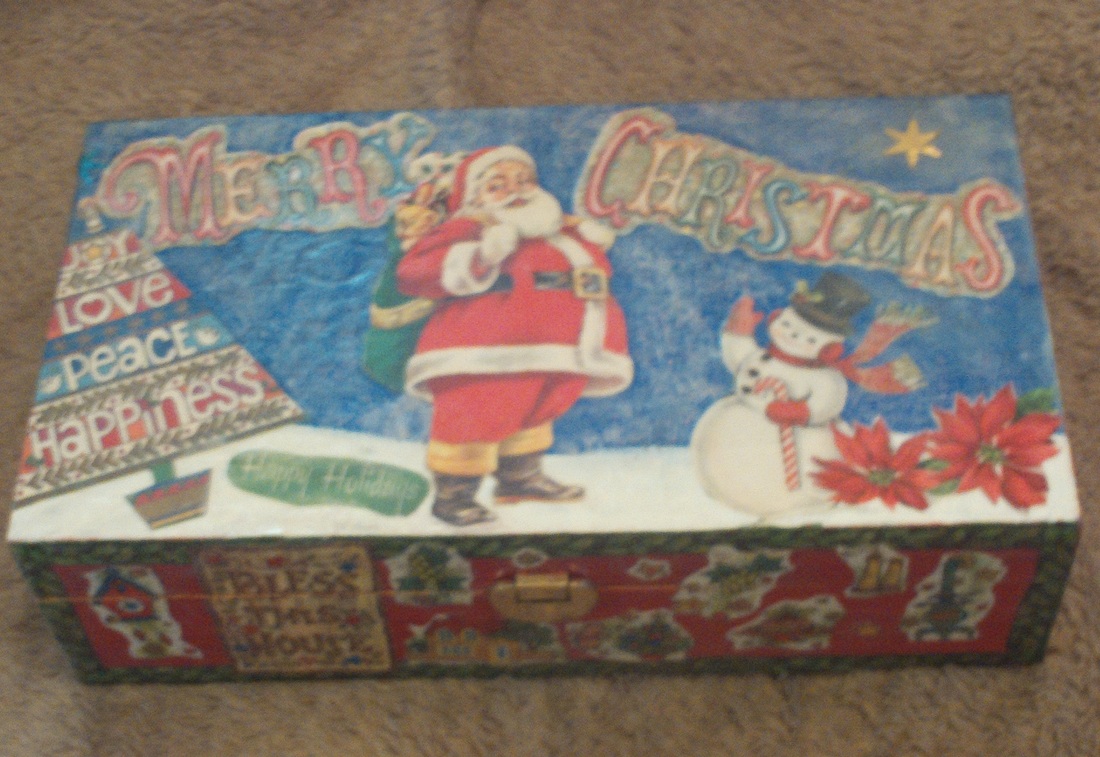
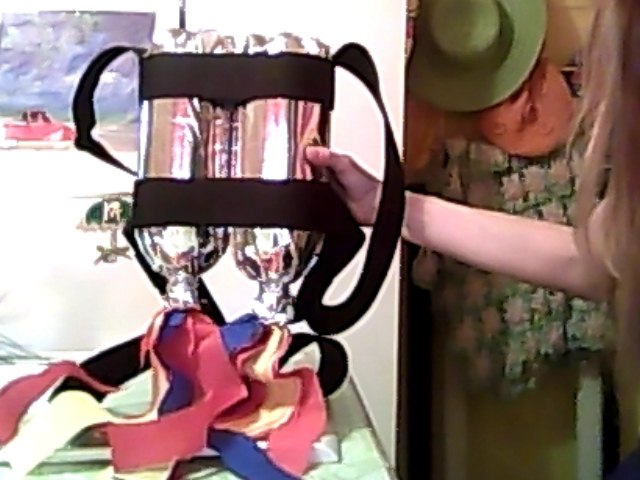 I saw one like this on pinterest and decided to make one for my grandson Sam This rocket man jet pack is made out of: 2 2 liter pop bottles 1 silver table cloth from dollar store ( I had it) 1 Seatbelt like strap with locking ends ( I had this) colored streamers tape hot glue I wrapped the pop bottles in the mylan silver table cloth and secured with clear tape. I configured the strap and cut it to fit using hot glue to secure the jetpack in place. Finally the fire is colored streamers secured with hot glue to the open bottle cap upside down. He loves It! 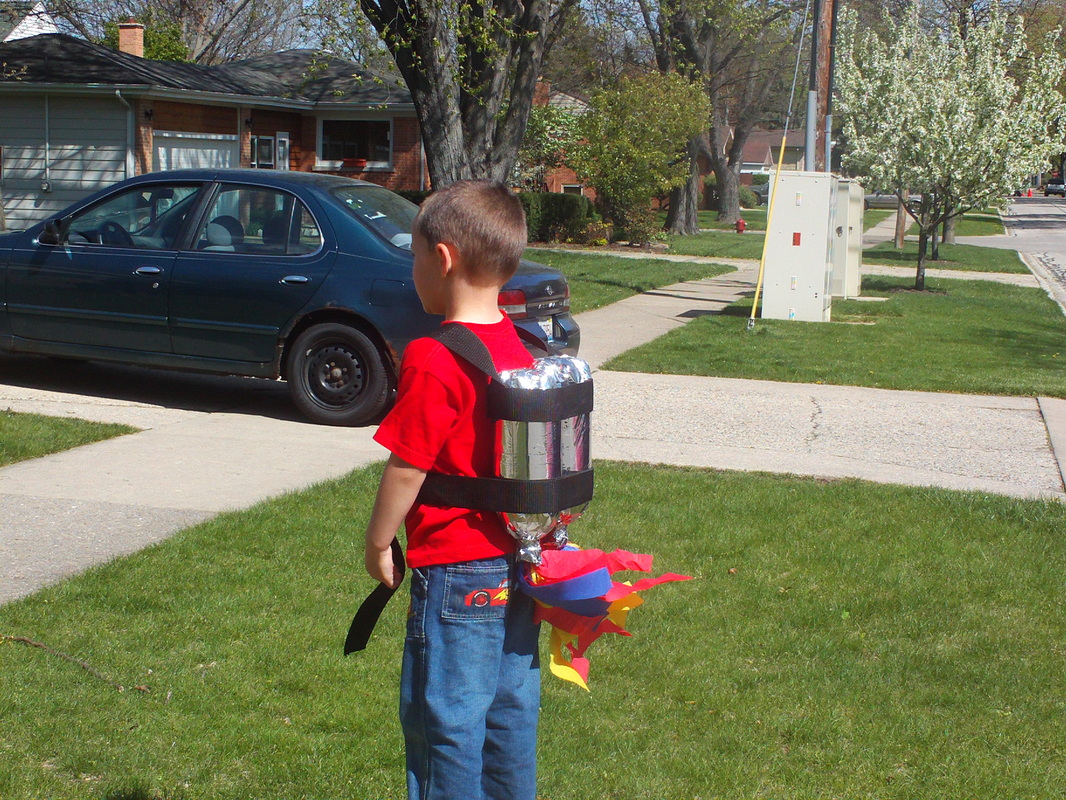 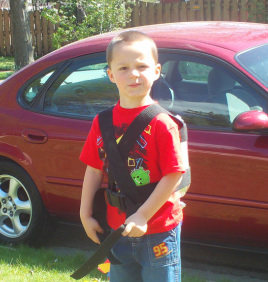 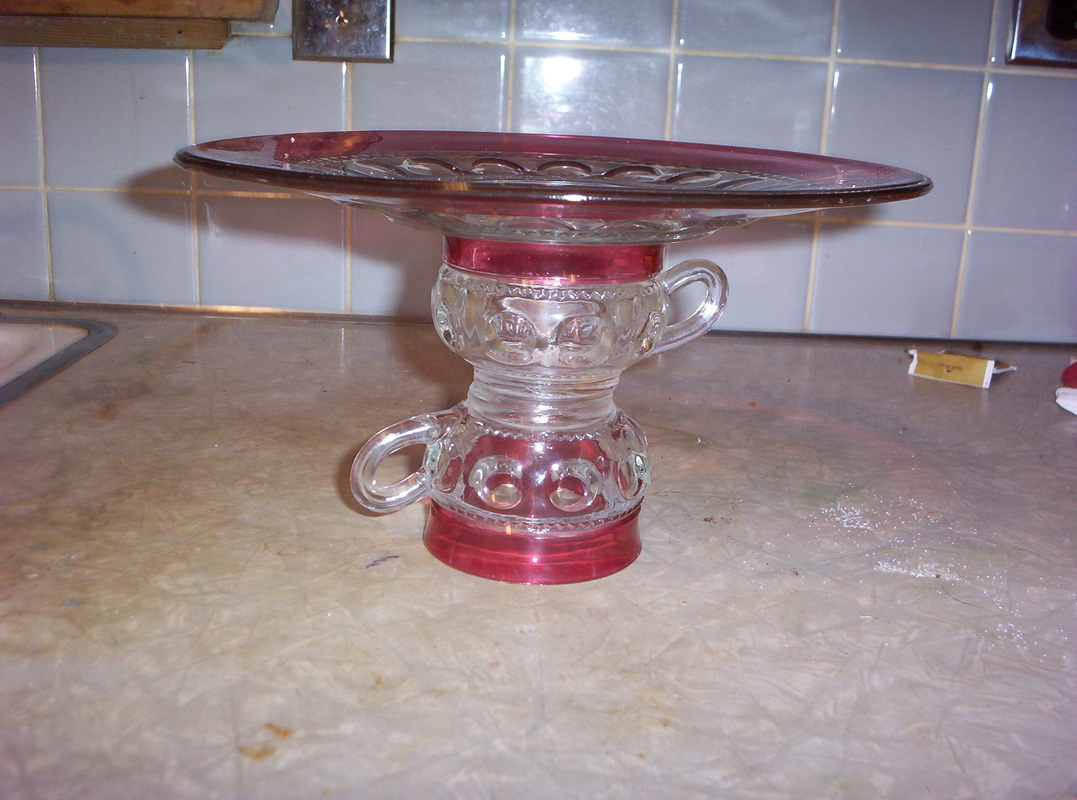 Sometimes it is hard to figure out what to do with bits and peices we collect from loved ones or bought cuz we thought it was cute. Grandma had these three peices from her mom and she loved them. I know this because she kept them in a box hidden. She put the things she loved away for safe keeping but rarely got to enjoy them because they were away. I on the other hand beleive I should see and enjoy the things I love and cherish. with a good glass glue I glued the two cups together end to end with the handals opposite and ordimental. I then glued the plate to the rim of the cup. It was that simple. Now it is used all the time and sits on my dining table with a candle on top. 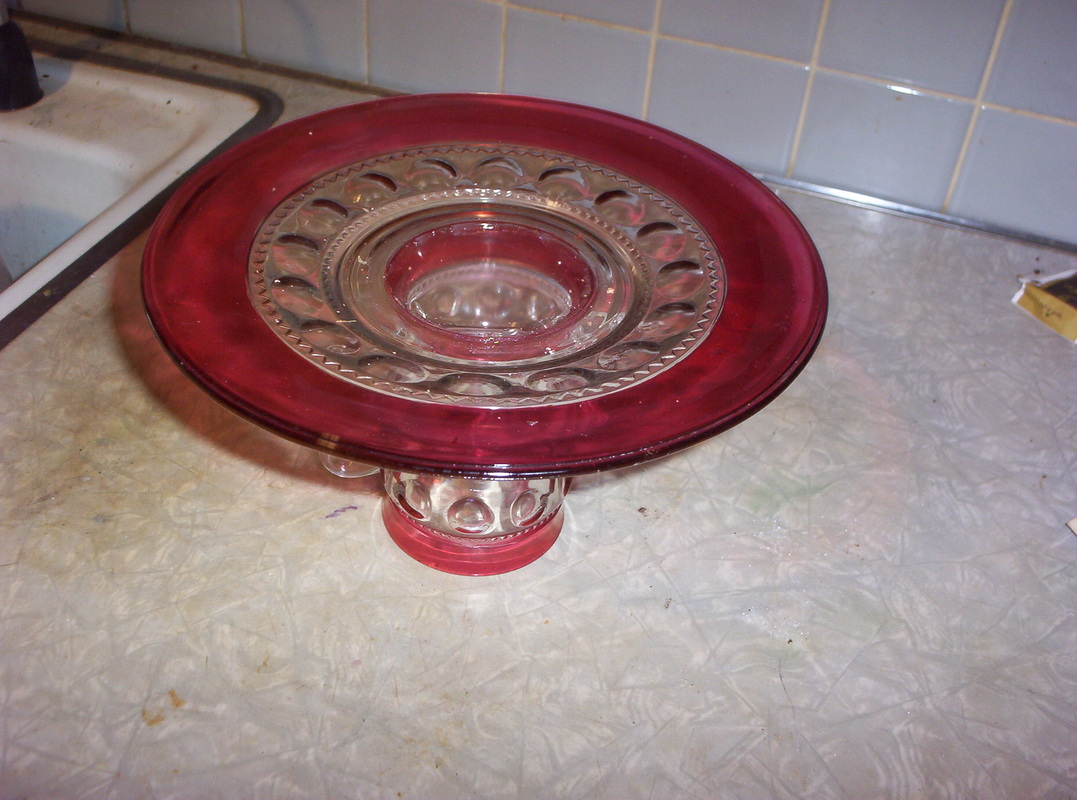 One thing I know is I always say I am going to do it...make gifts but then last minute buy them....This year I started in January and have many gifts done. I started by making memory boxes christmas theemed. I took Bola wine boxes from local store and used christmas cards and wrapping paper my mother in law saved since the 1930's to decorate and make special. I now have 10 boxes made and they turned out better than I imagined. I did the inside with many wishes cut out from the cards...a little paint and decupage with some enbelishments...everyone who sees them loves them! The first step is to find a wooden box clean and sand if need be. Gather old christmas cards, wrapping paper, ribbons, glitter, paints and anything else you can think of to decorate your box. Lay out your designs for all sides and inside of box. Paint the box the colors you want add glitter for stars or snow. Cut out your designs and glue them onto the box. Have fun and let the kid in you out! make sure you allow all layers of paint and glue to dry befor adding a new layer. In the end when it is all done add modge podge in 2-3 layers for sheen and to protect it forever! Obviously you can make your box any theem or design other than christmas ...only you know what others may love and what you may have. Seen below is my first box.... the santa was actually an ad that i found from 1954 that was in with grandmas cards. the tree was a card from the 70's and the snowman was from a card to my hubby from the late 50's. I cut out the flowers from wrapping paper and the star was a foil star from my art stuff. on the front side the boarder was made from a christmas napkin i liked and saved.....too funny but it looks great! use what you have and be creative!
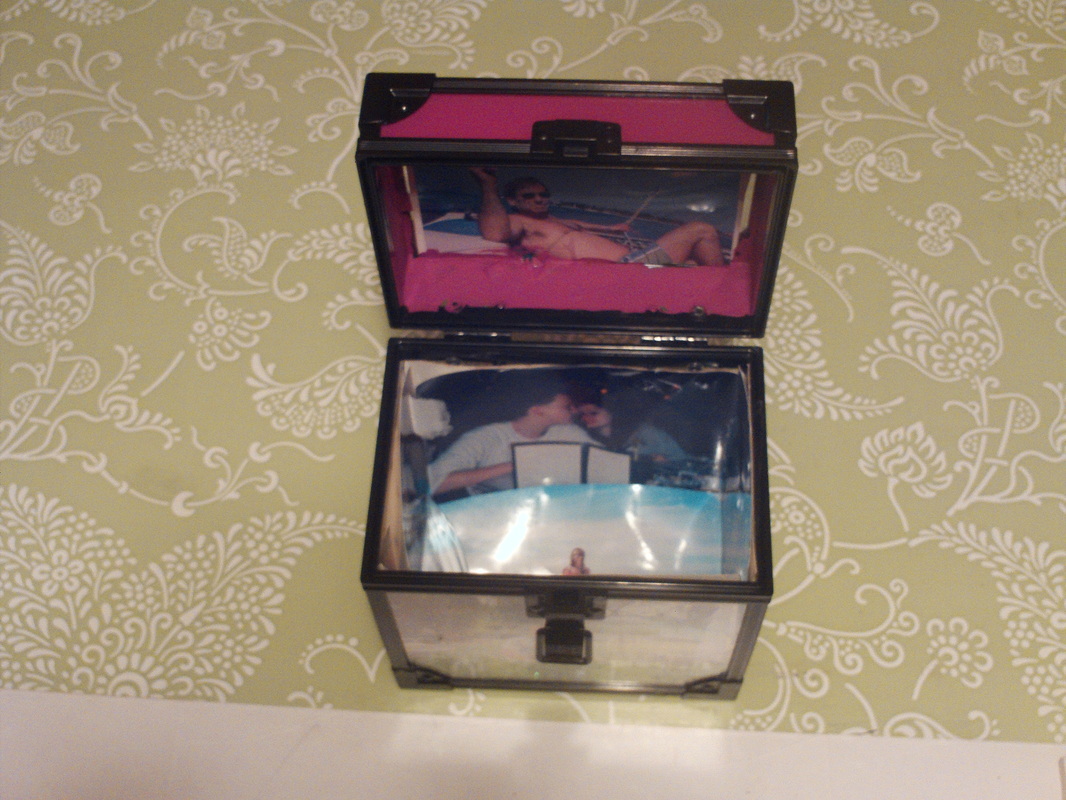
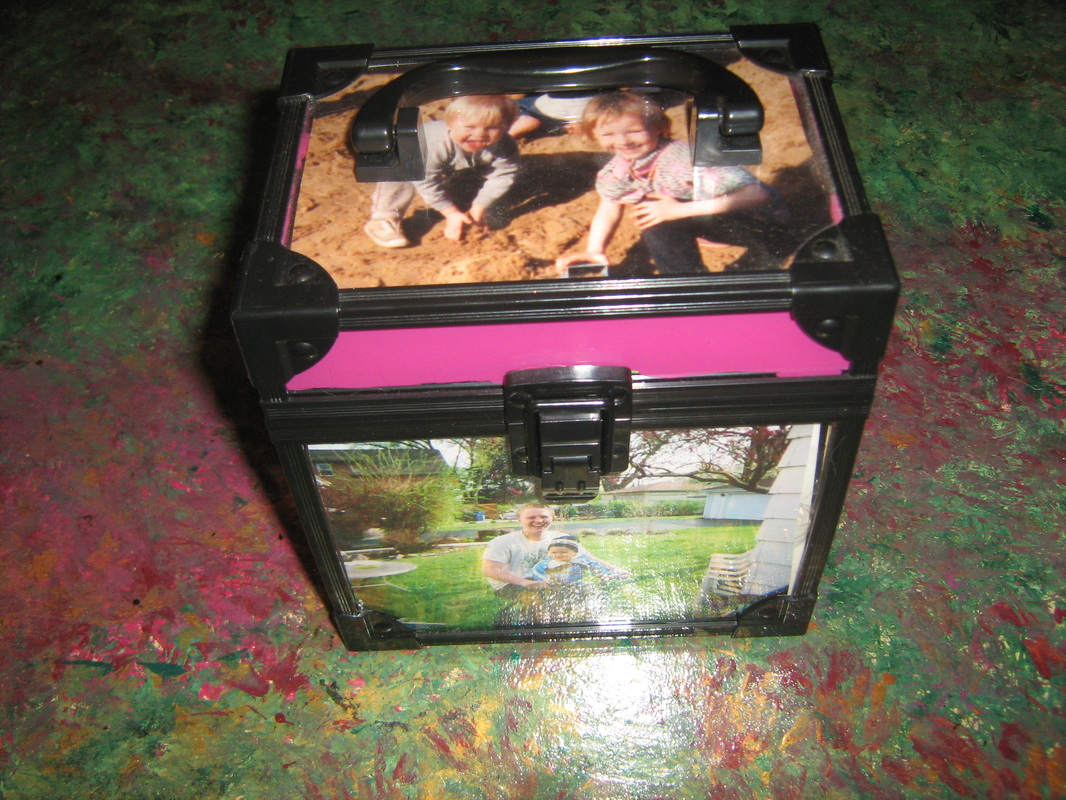
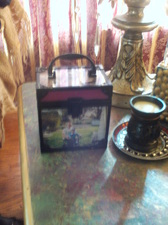
This is box #4 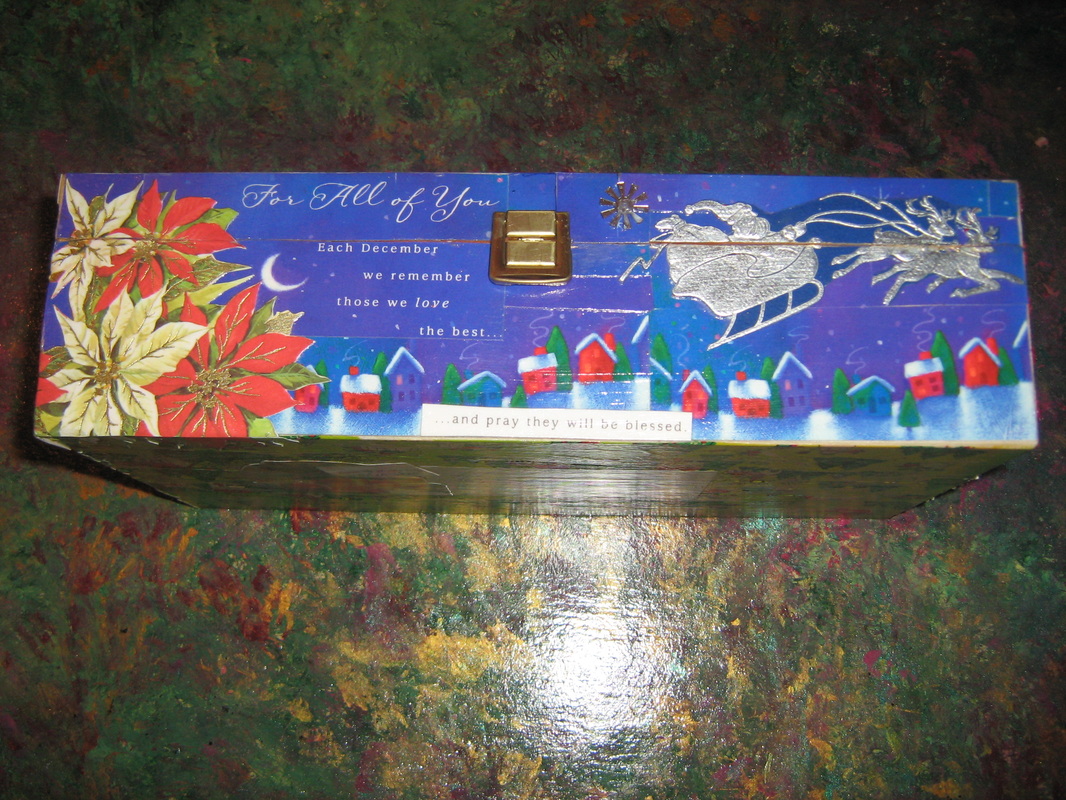 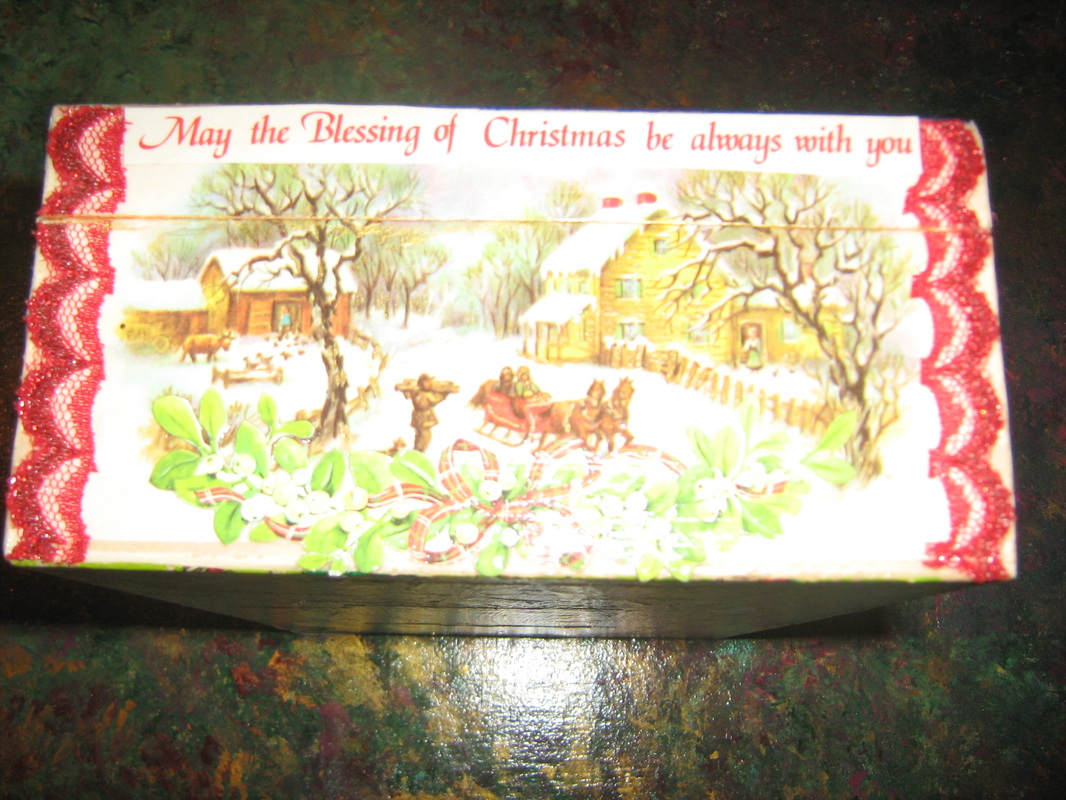 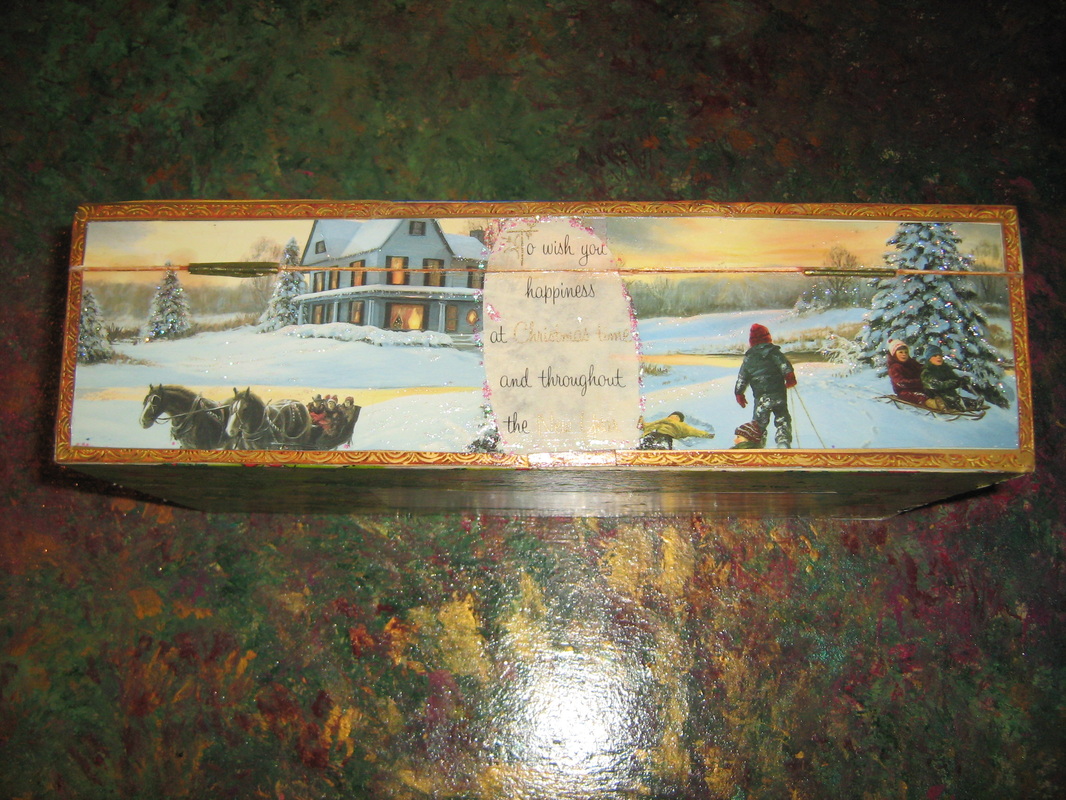 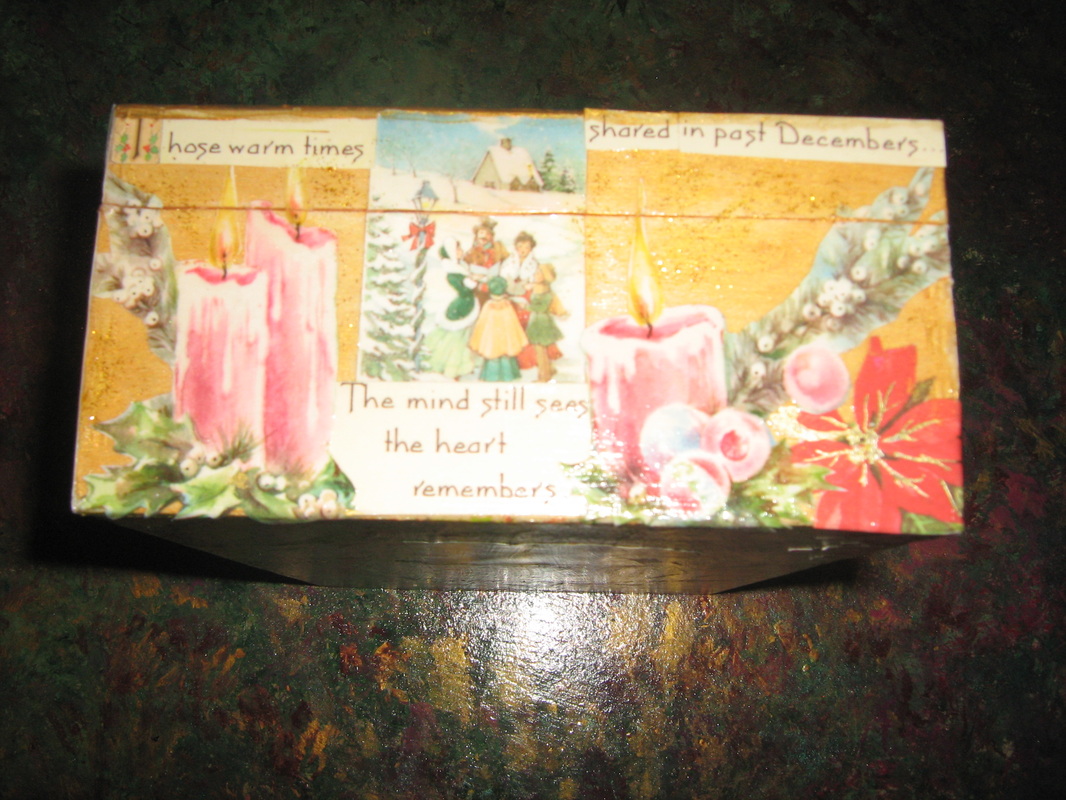  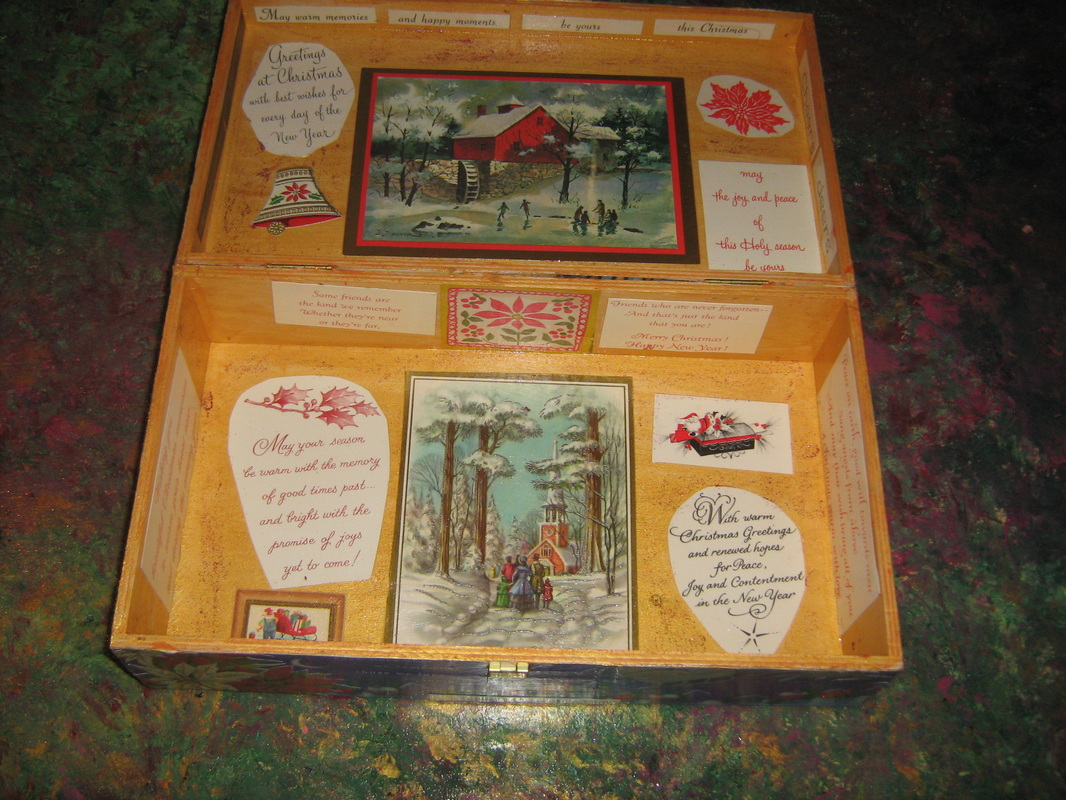 |
|


 RSS Feed